The art of building model boat kits has increasingly become a rewarding way to spend your free time, creating something to be proud of. Putting together a model ship requires time and patience, with the majority of wooden boat kits containing 100s of small scale pieces. The picture below shows a freshly opened Cutty Sark model kit. As you can see, there are many pieces involved in the construction of a ship model.
Due to the complicated nature of building a ship from a model kit, we have put together a few easy steps for getting into the world of building model boat and ship kits. Customers often say to us that they struggle with making their models or that they take much longer to complete than they originally thought. This guide is intended to cover the basics only and we cannot stress enough the importance of, firstly, following the instructions that come with your model kit and secondly, of getting a kit that matches your skill level and experience.
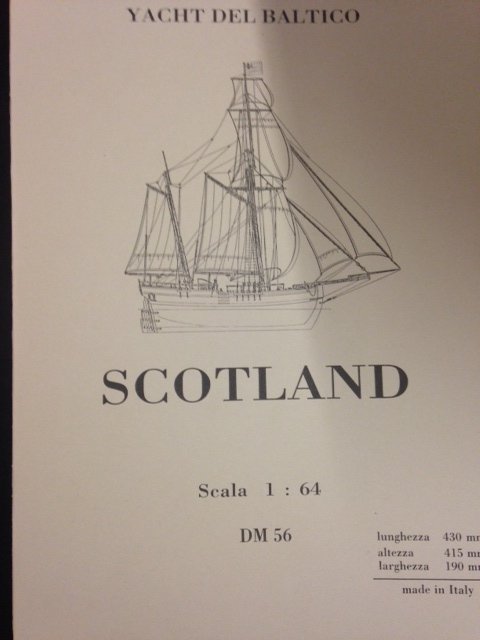
Step 1- Choosing the model kit you would like to build. Whether it’s the history of the ship that fascinates you, the way it looks, the name, the difficulty, or the price, with over 150 model kits to choose from, you are sure to find something suitable for you. We have a very selective range of model kits that spans across many years, from historical exploration and fishing vessels to modern military ships. Below are just a few examples of the kit range we have at Premier Ship Models.

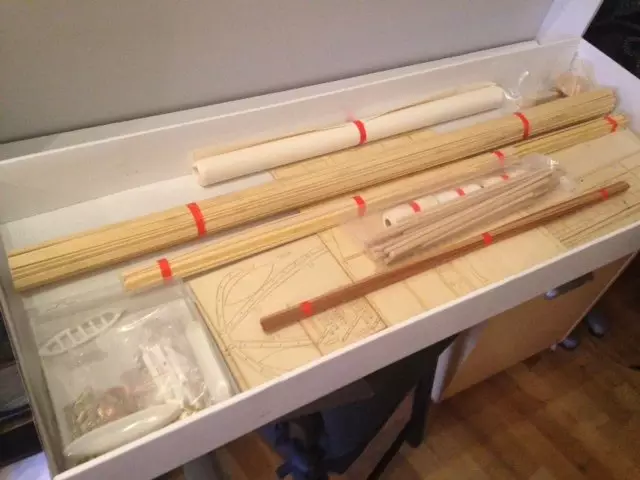
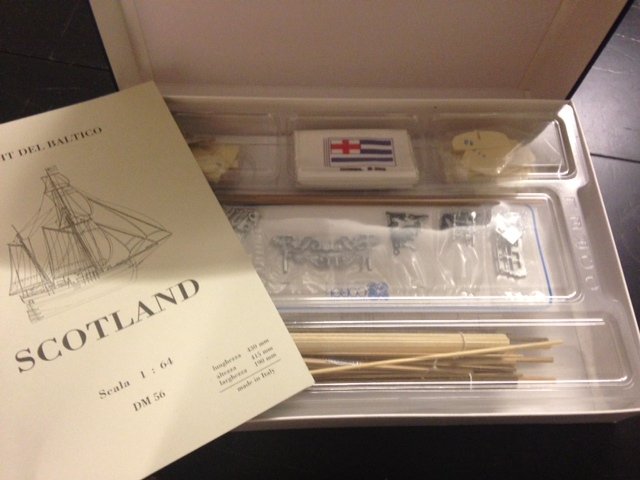
Step 2 – Once you have chosen, purchased and eagerly awaited the arrival of the perfect ship kit for you, it’s time to open the box and have a panic attack at the amount of pieces you see in front of you. (Don’t worry; there is a place for every single part you see and the included instructional manual will carry you through this process). The Scotland Baltic is a slightly smaller ship from our selection and below is a picture of what you would expect to see when you open a kit box for the first time.
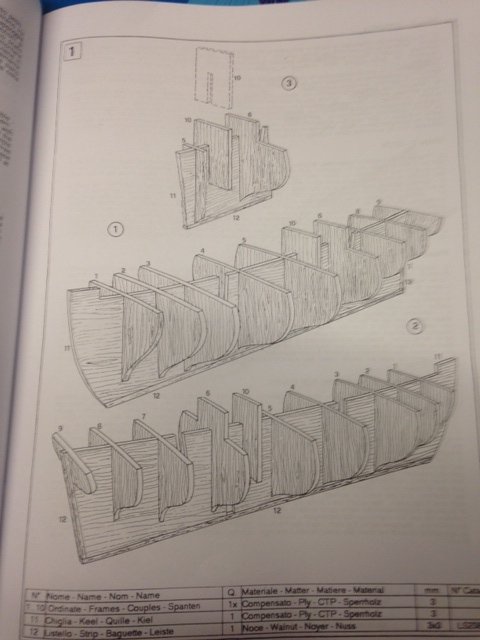
Step 3 – Have a good read through the manual, the information and pictures give a lot of detail and instructions of where everything should go. We cannot stress enough, the importance of reading this manual, it is extremely useful!
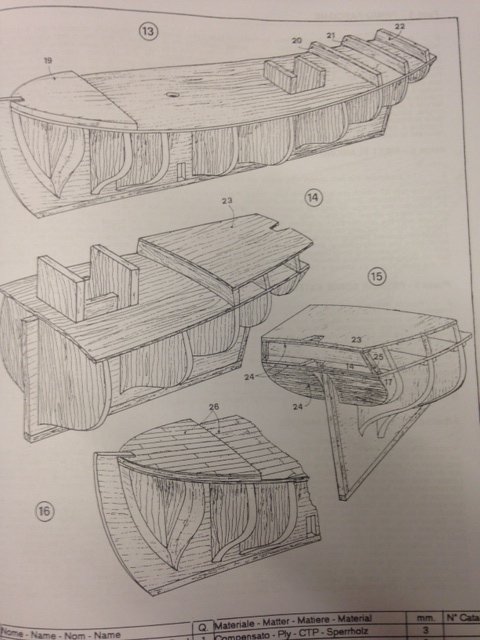
Step 4 – With most kits, the first building step is the bulk heads; slot the ship’s bulkheads over the ribbed full frame or keep. (Bulkheads are partitions which help to improve the model ships structural strength.
Step 5 – Soak wooden planks for the hull in water. This helps the planks to become more pliable and therefore it will be much easier to construct the hull. Mould the wet planks around the bulkhead so they fit the structure of the hull.
Step 6 – Glue each wooden plank onto the bulkhead of the model ship. If there are any gaps, cut the remaining wooden planks and glue these to the uncovered areas.
Step 7 – Add a second layer of wood planks to finish the construction of the hull. Excellent! Now you have a hull to the ship and it will have begun to take shape!
Step 8 – This is the time to make the hull look nice and smooth. Begin by using sandpaper to smooth down and rough areas on the hull. (Tip – applying layers of clear finish or shellac will help to protect the wood.)
Step 9 – Cut out gun ports on the side of the hull. Have a look at the plans inside the model boat kit for reference to achieve maximum accuracy and give your model a truly authentic look.

Step 10 – Now it’s time to lay and glue the ship’s deck planks in to place.
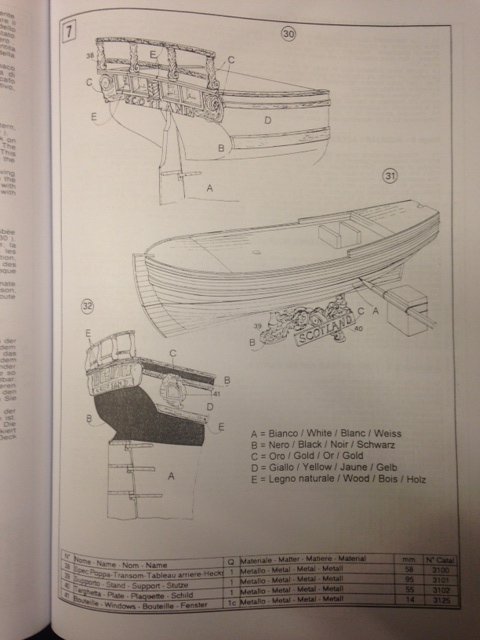
Step 11 – Adding the details and other pieces of the model boat or ship is when it gets a bit tricky. These may include carving the stern and adding a ship’s wheel and cannons. (Remember; always refer to the plans and instructions in order to achieve the best results)
Step 12 – Painting the model. Some would argue that this is one of the more relaxing phases of kit building. For this step it’s a good idea to refer to original pictures of the model, rather than the instruction manual, and matching these as closely as possible to achieve an authentic final display piece. Of course it is also your opportunity to be creative, give the ship your own stamp!
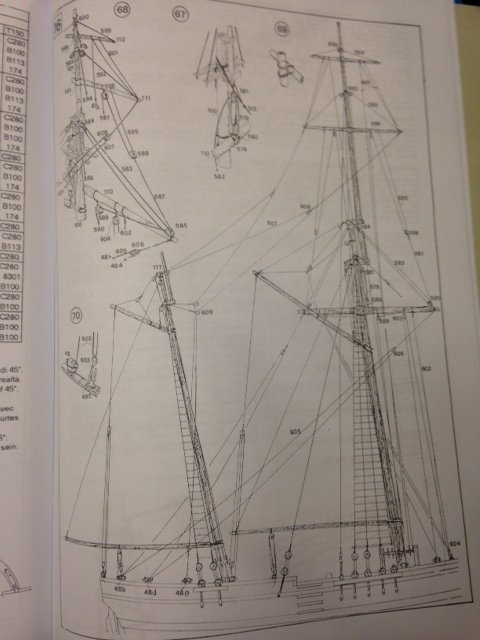
Step 13 – This is usually the most difficult step of building a model boat kit or ship. Adding the ships mast/s riggings and sails is a delicate process which takes time and dedication. (Don’t give up now, you’ve come so far!) There are horror stories of model builders leaving the rigging of a ship years to complete.But as long as you follow the instruction manual you will be fine, it’s a delicate process and can be frustrating, but it will be worth it in the end.
We hope you have enjoyed our quick step guide to building a ship kit. Please remember that these instructions are supposed to be a brief insight and that you should always follow the instruction manual when constructing your ship. Feel free to tell us your stories of building a model kit below, did you have any disasters? If you want to check out the model kit in this guide please click here for the Scotland Baltic. Please also feel free to check out our extensive range of model kits at Premier Ship Models. Happy kit building!